Yes, its finally here. I know you all have been anxiously awaiting some guidance on creating a child theme. This first part of the tutorial will cover the basics. I’m going to try to assume you know absolutely nothing about WordPress or child themes.
It will however, require that you understand some simple things like how to FTP to your server, browse the file structure, and upload/download files to your WordPress installation.
Step 1: Creating the Folder and Stylesheet Files
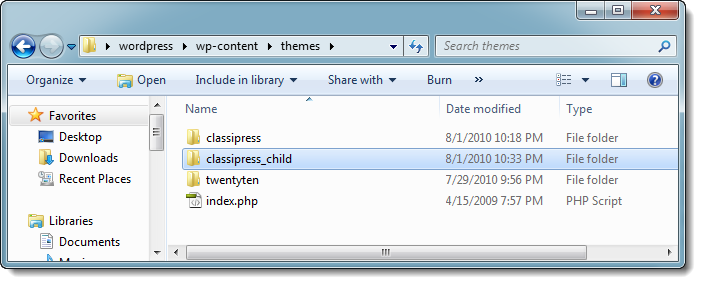
What I have to show you here is that I’ve downloaded the most recent version of WordPress, at the time of writing this article. Then I’ve placed the folder on my desktop and navigated to the “themes” directory. I’ve also already copied my “ClassiPress” theme folder that I purchased into this folder.
Next we want to create our “CHILD THEME” folder. For this example lets use “classipress_child”. So create a new folder with this name in the “themes folder”. When you have completed this, your file navigator should look something like this.
Now lets open up our “classipress_child” folder and create the first and only required file. The file is called “style.css”. Modify that file, adding following code:
/*

Theme Name: ClassiPress - Child Theme

Theme URI: http://appthemes.com/

Description: Child Theme for ClassiPress

Author: Seth Carstens

Author URI: http://sethcarstens.com/

Template: classipress

Version: 3.0.3

*/
@import url("../classipress/style.css"); @import url("../classipress/styles/red.css");
You can replace the author information with your own information, but keep in mind after you activate this theme, you won’t want to modify any of this information as it could disable the child theme or give you a temporary error. You will also notice the import after the comments. This is to include all of the original styles in the child theme. You do NOT have to do this, but for the simplicity of what we are doing here, I’m going to import all the original styles.
EDIT: Please note we added the red.css import above. You will also need to “Disable Core Stylesheets” from the ClassiPress settings page:
Step 2: Basic Changes Using the Stylesheet
Now we are going to make some basic changes to the stylesheet. Lets use the following code which is going to change the entire page to a very “dark” website. Simply copy and paste this code BELOW all rest of the code on the “style.css” page, thus appending it to the file.
body, .content, .content_botbg, .header_main_bg, .header_menu, #nav li { background: #000 none; border-top: none; }
Step 3: Upload and Activate
The last thing you are going to do is upload your child theme. You need to have a basic understanding of FTP in order to transfer your child theme folder into your themes folder on the server. When you are done, you will see both the “classipress” and “classipress_child” folders in the wordPress themes folder. This folder on the server is typically located at “/public_html/wp-content/themes/”.
Another option is to use the wordpress wp-admin pages to upload your child theme, but it is not encouraged or recommended if you plan to modify your files often. To do this you simply “ZIP” your entire “classipress_child” theme folder into a zip file. Typically on Windows, you right click on the folder -> Hover over the “send to” menu and then select “Compressed (zipped) folder” as shown here.
Once you have used the “Appearance -> Theme Upload” tool or FTP to upload the new child theme we created, we now need to activate the child theme. If you have followed the directions here correctly you will see the child theme when you click on the WordPress Admin -> Appearance. You will then activate the child theme as shown.
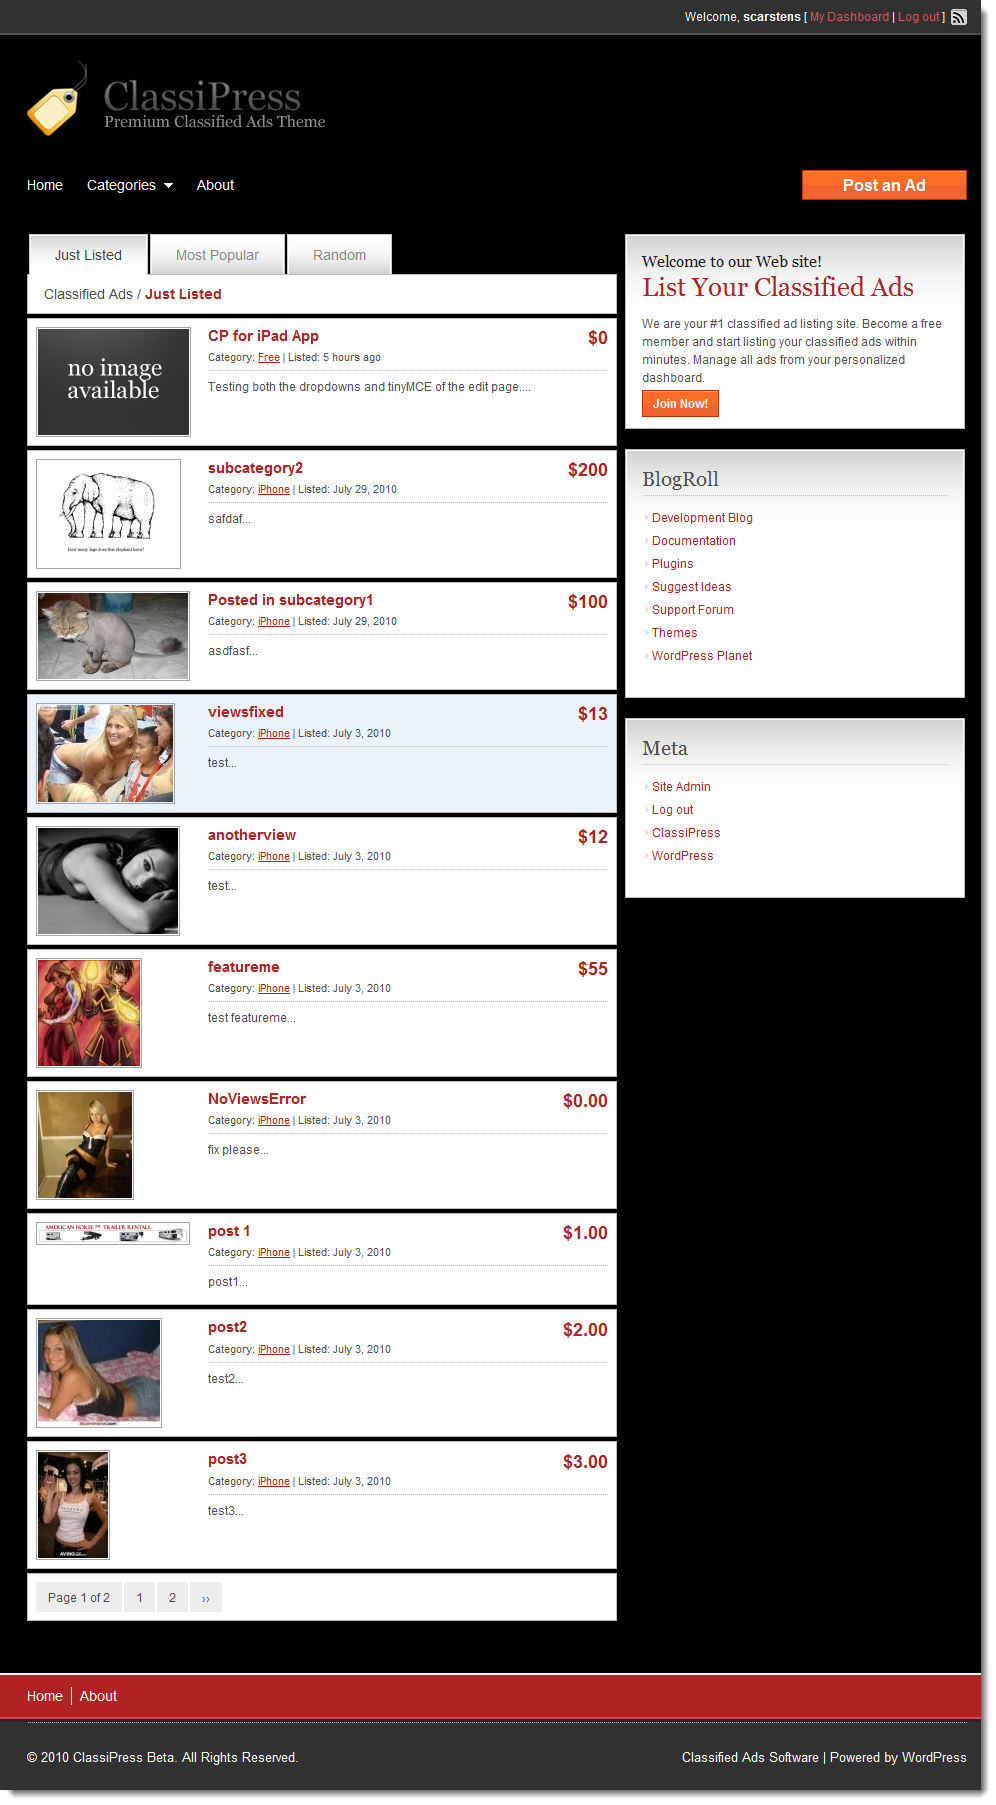
Congratulations! You have just created your first ClassiPress child theme! At the very least you now have complete control over all the style elements of ClassiPress which can be easily “undone” just by activating the original ClassiPress theme again. Here is a preview of what the tutorial creates (click to zoom):